I like pretty colors, and when I’m coding… I like pretty colors in my code. But syntax highlighting is not just about pretty colors, it helps developers to navigate the code and catch errors, by giving a consistent look to the different structures that make up a codebase. In comes Pygments, a syntax highlighter for use in code hosting, forums, wikis or other applications that need to prettify source code. It supports 573 languages and text formats and, at the time of writing, there are 47 Pygments styles. Among them, community favorites such as Atom, Gruvbox and Nord. But what if you want to use colors from other themes? Say… Rose Pine, Ayu or Cattppuccin. Then this guide is for you. I’ll go thought the steps I took to create the Rose Piné Pygments Style (link to repo). How to create a style, assign colors, test, set as plugin and publish.
Creating and installing a Pygments Style
Setting up your environment
Pygments is written in Python, and according to Pygments’s documentation, new styles can be added as plugins through entry points. So in essence, a new style is a small Python package. So we start like any other python project, with the virtual environment. I use Pyenv-virtualenv to create and manage environments and Poetry to manage dependencies, but you can use whatever you feel most comfortable with, although some steps might vary.
The main dependency of the project is Pygments which can be added with:
poetry add pygmentsThere are other dependencies that we will be using for documentation, listing, checking and testing like: pytest, darglint, coverage, flake8, black, bandit, sphinx and their extension justo name a few, and you add them to your dev group with the command.
poetry add -G dev (name of the package)This is why I normally use a template to start a project, which takes care of all the development dependencies needed for the backstage. My favorite template these days is Hypermodern Python Cookiecutter by Claudio Jolowicz, which uses the Cookiecutter, command line utility to create the project templates.
Then, at the start of the project the file structure looks like this:
pygments-rose-pine
├── .github/
├── tests/
├── src/
├── docs/
├── .gitignore
├── tox.ini
├── poetry.lock
├── CHANGELOG.md
├── README.md
├── CONTRIBUTING.md
├── CODE_OF_CONDUCT.md
├── LICENSE
├── pyproject.toml
└── codecov.ymlCreating the Style
Now for the style, the Rose Piné theme has three color palettes: Rose Piné, Rose Pine Moon and Rose Piné Dawn, which we’ll be implementing. Inside the src folder we’ll create a file for each of the pallets, like this:
src
├── __init__.py
├── rosepine.py
├── rosepinemoon.py
└── rosepinedawn.pyThe name of the files is important since it’s what will helps Pygments find the new style once the plugin is installed. For the styles themselves, according to the Pygments documentation all you have to do is subclass the Style class and define styles. To figure out how to do that I looked, into Reilly Siemmens’s Gruvbox theme for IPython, and in the case of the Rose Piné Moon palette, this is how the file rosepinemoon.py looks like.
from dataclasses import dataclass
from typing import Any

from pygments.style import Style
from pygments.token import (
    Comment,
    Error,
    Keyword,
    Name,
    Number,
    Operator,
    String,
    Text,
    Token,
)


@dataclass(frozen=True)
class Color:
    """Absolute colors as defined by rose-pine: https://rosepinetheme.com/palette."""  # noqa: E501

    moon_base = "#232136"
    moon_surface = "#2a273f"
    moon_overlay = "#393552"
    moon_muted = "#6e6a86"
    moon_subtle = "#908caa"
    moon_text = "#e0def4"
    moon_love = "#eb6f92"
    moon_gold = "#f6c177"
    moon_rose = "#ea9a97"
    moon_pine = "#3e8fb0"
    moon_foam = "#9ccfd8"
    moon_iris = "#c4a7e7"
    moon_highlightlow = "#2a283e"
    moon_highlightmed = "#44415a"
    moon_highlighthigh = "#56526e"


class RosePineMoonStyle(Style):
    """Soho vibes for Pygments. Based on the colors of Rose Pine Moon theme."""

    styles: dict[Any, str] = {
        Comment: Color.moon_subtle,
        Error: Color.moon_love,
        Keyword.Namespace: Color.moon_pine,
        Keyword.Constant: Color.moon_rose,
        Keyword.Type: Color.moon_foam,
        Keyword: Color.moon_pine,
        Name.Builtin.Pseudo: Color.moon_love,
        Name.Builtin: Color.moon_text,
        Name.Class: Color.moon_foam,
        Name.Decorator: f"{Color.moon_iris} bold",
        Name.Exception: Color.moon_foam,
        Name.Function: Color.moon_love,
        Name.Variable.Magic: Color.moon_love,
        Name: Color.moon_text,
        Number: Color.moon_rose,
        Operator.Word: Color.moon_pine,
        Operator: Color.moon_pine,
        String.Affix: Color.moon_pine,
        String.Escape: Color.moon_pine,
        String.Interpol: Color.moon_text,
        String: Color.moon_gold,
        Text: Color.moon_text,
        Token.Punctuation: Color.moon_subtle,
    }
The first section corresponds to the imports for dataclass and typing, then the Pygments Style to be subclassed and the tokens to assign colors to keywords, numbers, comments, etc. Below that, two classes are defined: One for the colors, and another for the Style. To know which color goes where, I used the specific colors from palette as defined in the Rose Piné Theme page, and Pygment’s Token Guide.
Important!
Pay attention to the relationship between the name on the file and the Style class, for the Rose Piné Moon palette shown above, the filename is rosepinemoon.py, while the class name is RosePineMoonStyle. As explained before, this makes it possible for Pygments to find the style when you install the plugin.
Installing your Pygments style
Now that you have your custom style, you need to install it by registering it as a plugin. This can be done from the pyproject.toml file or setup.py file if your project uses that file. This project uses the pyproject.toml file, so to register the plugin I used the [tool.poetry.plugins."pygments.styles"] table. Also, one thing to note is that, on the [tool.poetry] table, I registered the style files as packages this way I can reference the files directly on the plugins table.
[tool.poetry]
…
packages = [
    { include = "rosepine.py", from = "src" },
    { include = "rosepinemoon.py", from = "src" },
    { include = "rosepinedawn.py", from = "src" },
]

…

[tool.poetry.plugins."pygments.styles"]
"rose-pine" = "rosepine:RosePineStyle"
"rose-pine-moon" = "rosepinemoon:RosePineMoonStyle"
"rose-pine-dawn" = "rosepinedawn:RosePineDawnStyle" After that, you can run the poetry install command to install the local package.
Testing and Troubleshooting
“If it’s not tested, it’s broken.”
Bruce Eckel
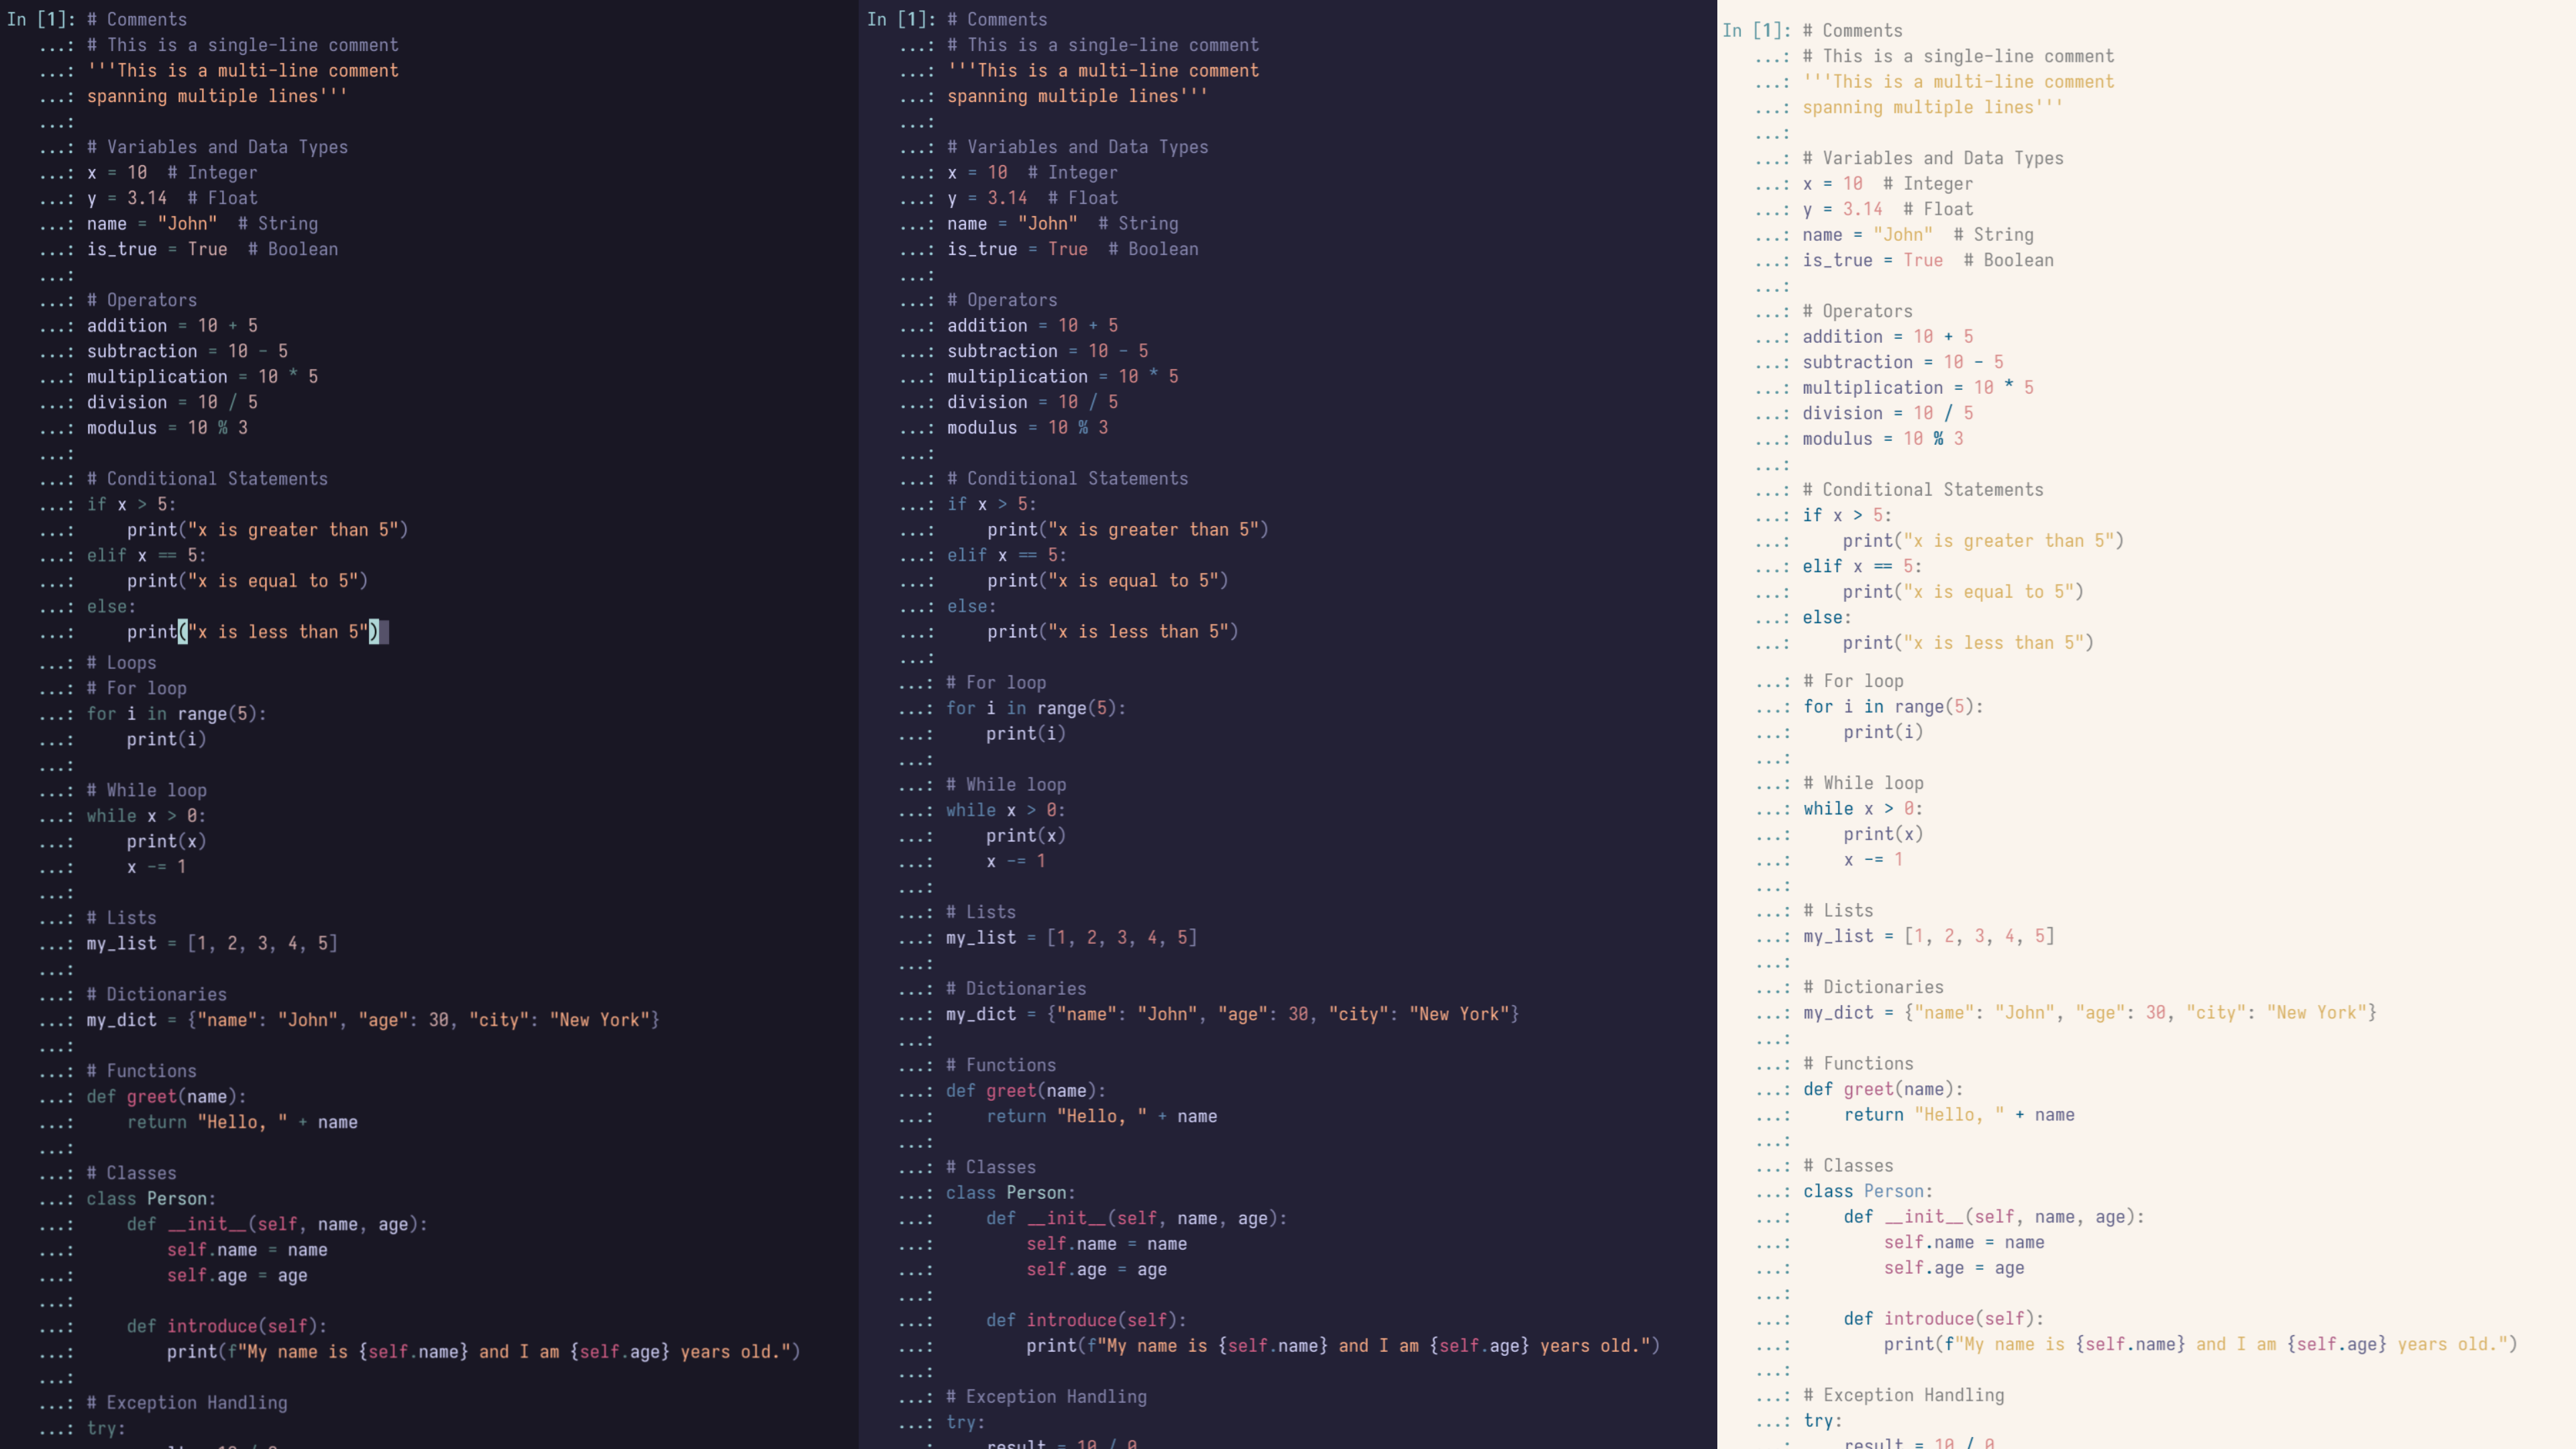
Now we are ready to test, but… how do we test colors? The manual approach is to use the newly installed theme and see what it looks like on a sample of code. I did that with IPython, and this was the result.
But for a more programatic approach, testing can be done by comparing the output from the function against an ANSI string with the desired result. To do that, inside the tests files, we can create the test_rosepine.py file to test our new styles. We’ll be using Pytest for testing , and some functions and classes from the Pygments package, so we’ll import those first, as well as the styles we have created.
import pygments
import pytest

from pygments.lexers import PythonLexer
from pygments.formatters import TerminalTrueColorFormatter
from pytest import param

from rosepine import RosePineStyle
from rosepinemoon import RosePineMoonStyle
from rosepinedawn import RosePineDawnStyleThen, for each style, we’ll create a function that highlights a string of code. The example below is for the Rose Piné Moon theme.
def highlight_moon(code: str) -> str:
    """Highlight code in true color (24-bit) with the RosePineMoonStyle."""
    return pygments.highlight(
        code=code,
        lexer=PythonLexer(),
        formatter=TerminalTrueColorFormatter(style=RosePineMoonStyle),
)Now we can create our tests. The concept is simple, but there are a ton of tokens to test, so I’ll be using the @pytest.mark.parametrize decorator to tests agains all cases. Below it’s an example, for comments.
@pytest.mark.parametrize(
    "code,expected",
    [
        param(
            "# This is a comment.",
            "\x1b[38;2;144;140;170m# This is a comment.\x1b[39m\n",
            id="Comment",
        ),
        …
    ],
)
def test_highlighting_moon(code: str, expected: str) -> None:
    """The given code should highlight as expected."""
    assert highlight_moon(code) == expected
The decorator takes a string with the variables to parametrize separated by commas as the first argument, and a list of the parameters as the second. The use of the param function was also informed by Reilly Siemmens’s Gruvbox theme‘s testing suit, and while testing, I found out just how useful is the id argument. It can help you know which of the parameters failed while testing, which is specially important in this case, since there were a lot of them. To run the tests you can use.
pytest -covThis will run pytest, and coverage, to see what amount of code is covered by your tests.
A word about testing
Bear in mind which versions of Python you’ll be testing for, and the package versions. I usually test for three versions prior to the one I’m developing in, this time it was Python 3.11, so I tested for Python 3.9, 3.10 and 3.11. To test multiple versions nox or tox are very useful tools.
Publishing your Pygments style
Preparing your style for publication
Once the testing is done we are ready right? No. Before we can start sharing our creation with the world we need to make sure it’s understandable and well documented. That’s where CONTRIBUTING.md, CHANGELOG.md, CODE OF CONDUCT.md, LICENSE.md and README.md files come in. This is a small plugin, so the installation, usage and requirements can be specified in the README, and it might be enough. But if you are working on a larger project, keeping a documentation folder hosted on a platform like Read the Docs or GitHub Pages is something that needs to be done. Below are some steps if you are interested in getting some practice setting up documentation.
Creating documentation with Sphinx
While working on the following posts for this series, I’ve come across the news that Twitter’s API is no longer free to use. This means that moving forward I’ll be relying on the BeautifulSoup and Selenium to get the data.
To create our documentation we can use Sphinx, which is a very popular and widely used tool. Inside the docs folder we can create a new Sphinx project with:
sphinx-quickstartIf you are using a cookiecutter, you might find that the docs folder has already been setup. So you’ll need to check what is in there and what you might meed to add. If not, inside you’ll find a conf.py file and an index.rst file. Sphinx documentation is created using rst markup language, but you can use Markdown with the myst-parser extension. In this project I just used pandoc to convert my md files to rst and and set the output file be inside of my docs folder. This way I could link all the files inside my index.rst file’s table of content. Below is the first part of the file as an example.
.. |rose-pine-logo| image:: https://github.com/rose-pine/rose-pine-theme/raw/main/assets/icon.png    :width: 30

=======================================
|rose-pine-logo| Rose Piné for Pygments
=======================================

All natural pine, faux fur and a bit of soho vibes for the classy minimalist

|Python versions| |Latest release| |test| |Codecov| |License| |Black| |Rose Pine Community|

.. toctree::
   :maxdepth: 1
   :caption: Contributing
   :hidden:

   changelog.rst
   contributing.rst
   code-of-conduct.rst
   license.rst

 Installation
 ============

 ...
There you can see the documents linked in the Table of Contents, and since I don’t want it to show in the main page I used the :hidden: directive. After that, you can use the command sphinx build inside the docs folder and it will create a _build folder with your html output.
docs
├── static
├── _build
├── conf.py
├── index.rst
├── contributing.rst
├── code-of-conduct.rst
├── license.rst
└── changelog.rstThis is now the documentation is ready to be published.
Another thing to keep in mind is making sure our code is well formatted and follows PEP guidelines, for that we can use the flake8 and black packages.
Once all that is done, we are ready to build our first release. Thankfully Poetry makes that easy with the build command.
poetry buildThis will create a dist folder with two files inside.
dist
├── pygments_rose_pine-1.0.0.tar.gz
└── pygments_rose_pine-1.0.0-py3-none-any.whlThese are the files that can be installed when someone wants to use the style.
Sharing your new Pygments style
The first way of sharing your style is through GitHub, you can create a release and give people instructions in your README. The second it through PyPy, the Python Packaging Index, so people can install it using pip.
To create a release, you can go to your repo and under releases click on Create a new release. There you can tag it using Semantic Versioning to identify your release, and drop the files you you created on the dist folder.
Also, if your theme is part of a larger theme, like Rose Piné, you could write to the owner or organization to let them know you have created a new theme.
And that’s it, you can now create your own Pygments styles in the colors you like best. Also, this is a very good example of how to start and practice all the steps that go into creating and publishing open source packages. You can go crazy with this really, for example, you can do Continuous Integration with GitHub Actions or Travis CI, or use Codecov to measure coverage. All the bells and whistles.
Over and out… Happy coding!
Andrea